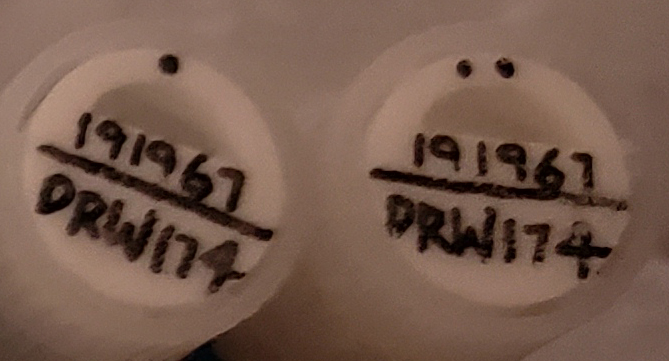
If there are multiple vials for a given specimen, add a single dot above the hole for the first sample, 2 dots for the second sample, 3 dots for the third sample, and so on. If the multiple vials have different preservation methods, the first dot should be given to tissue that was preserved frozen (e.g., in liquid nitrogen, if relevant) and subsequent dot(s) to other samples with a different preservation method (e.g., RNAlater). Do not add any dots if there is only one vial per specimen.
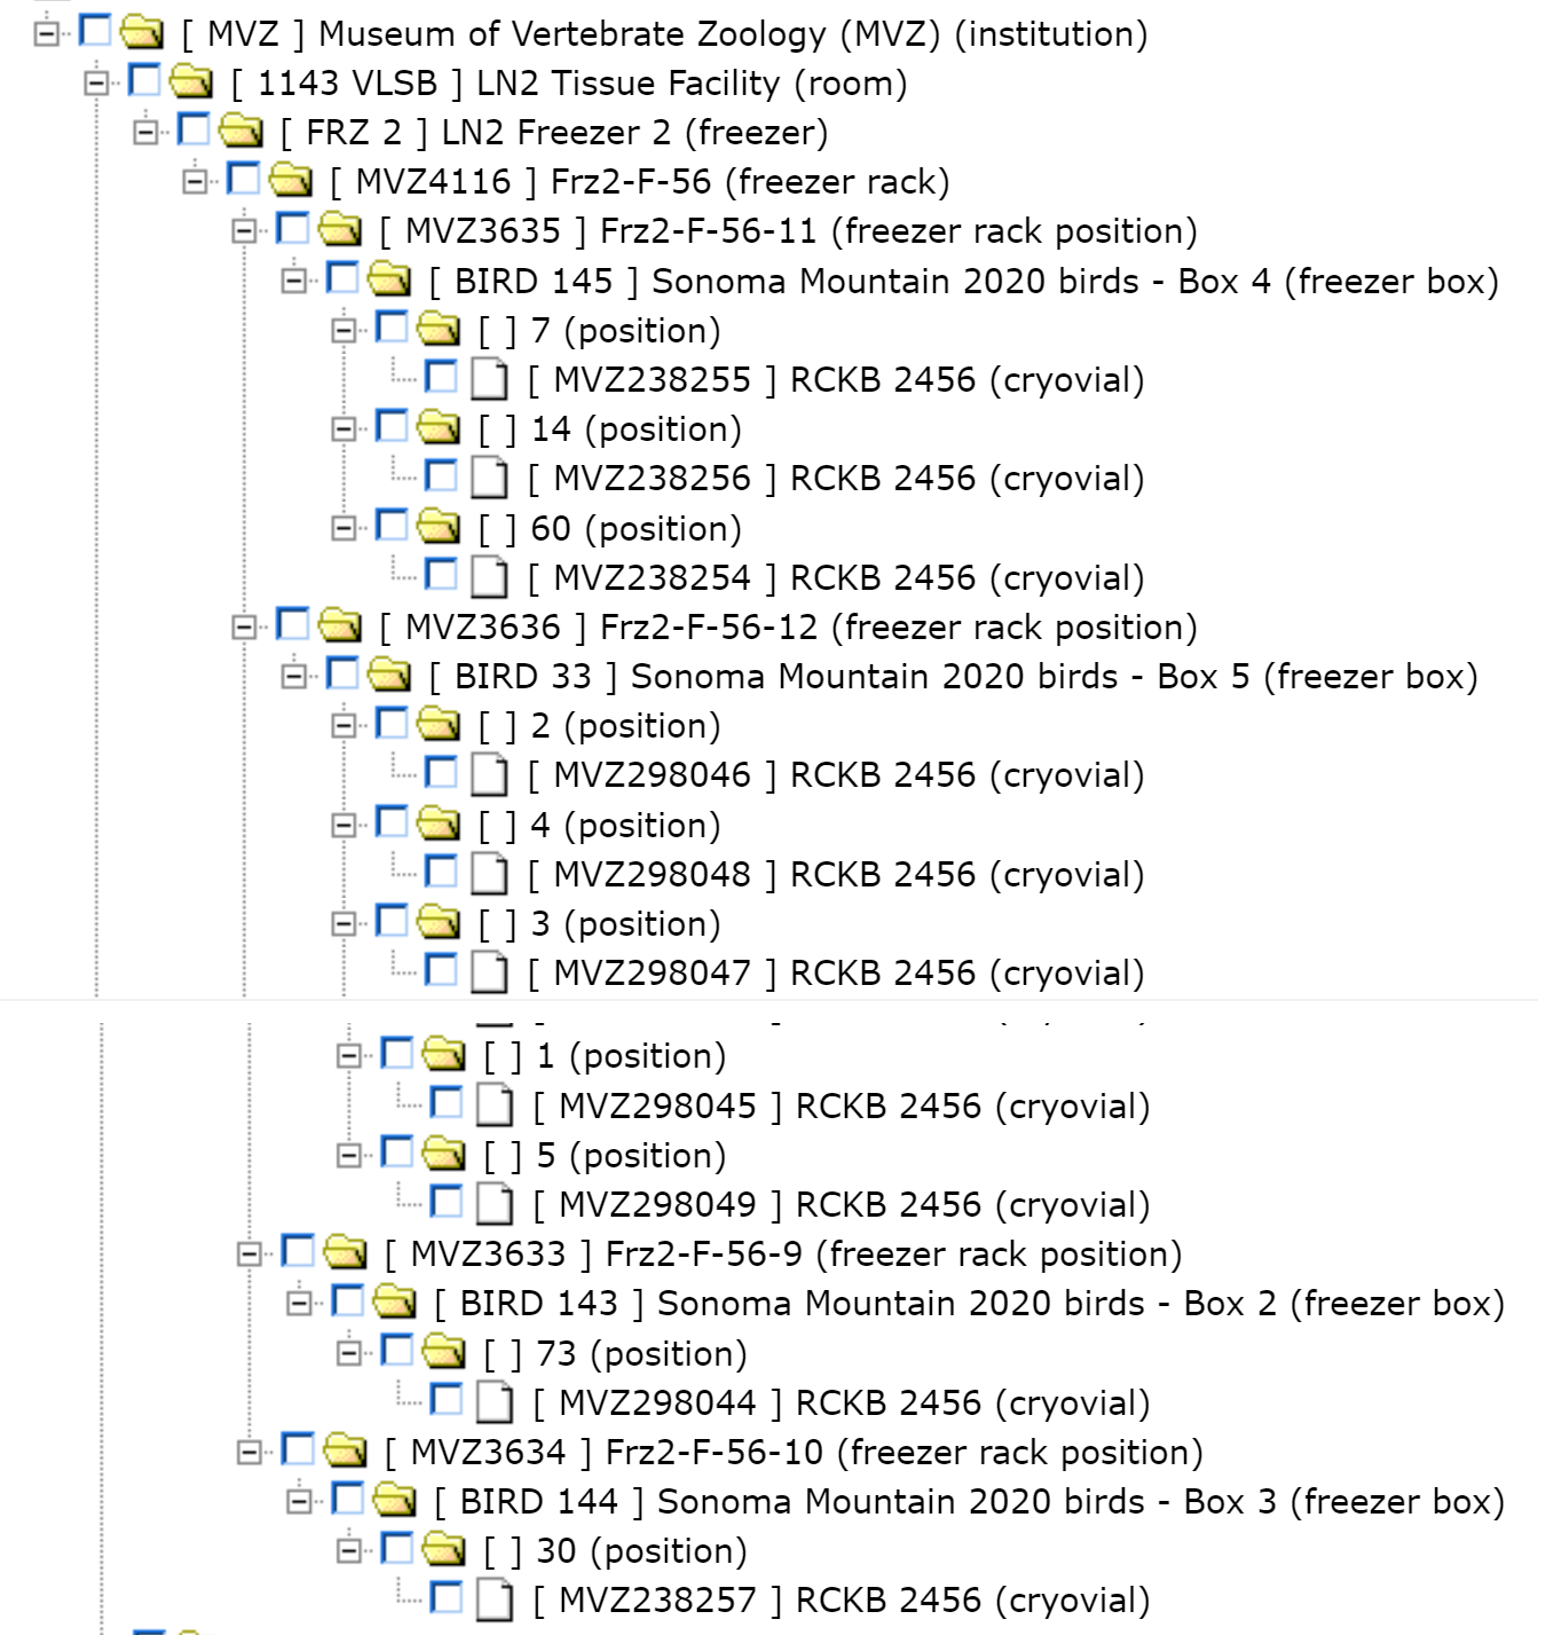
If uncataloged tissues are tracked in Arctos by scanning barcodes into box positions and editing labels to reflect the collector/preparator number (see Tracking Uncataloged Tissues), you can easily search Arctos to find the number of vials per specimen in instances where there are multiple vials. This is helpful when writing inserts, so that you know the number of inserts to write for each specimen. You will need ‘Manage container’ permission to conduct this search. Go to Manage Data —> Object Tracking —> Find Container. Enter the collector/preparator initials and number in the Label field and hit return. This will show the location of each vial, and you can count the total number of vials to determine the number of tissue inserts that need to be written for that specimen. In the example below, RCKB 2456 has 10 vials.

 If there are multiple inserts to write, it’s best to do them all at once before inserting then into the vial cap. To keep them in order, use wide packing tape and put a large piece that’s rolled to stick front and back onto a piece of cardboard (e.g., and old broken skin tray or any other cardboard). Stick the inserts onto the tape in the order of the cataloged samples.