The first step in cataloging tissues is to find their location. The procedure will differ by collection depending on how uncataloged tissues are tracked (see Tracking Uncataloged Tissues). To search for tissue locations in Arctos, you will need manage_container permission. Once logged in, go to Manage Data —> Object Tracking —> Find Container. You can either search by the barcode or label associated with a vial or freezer box.
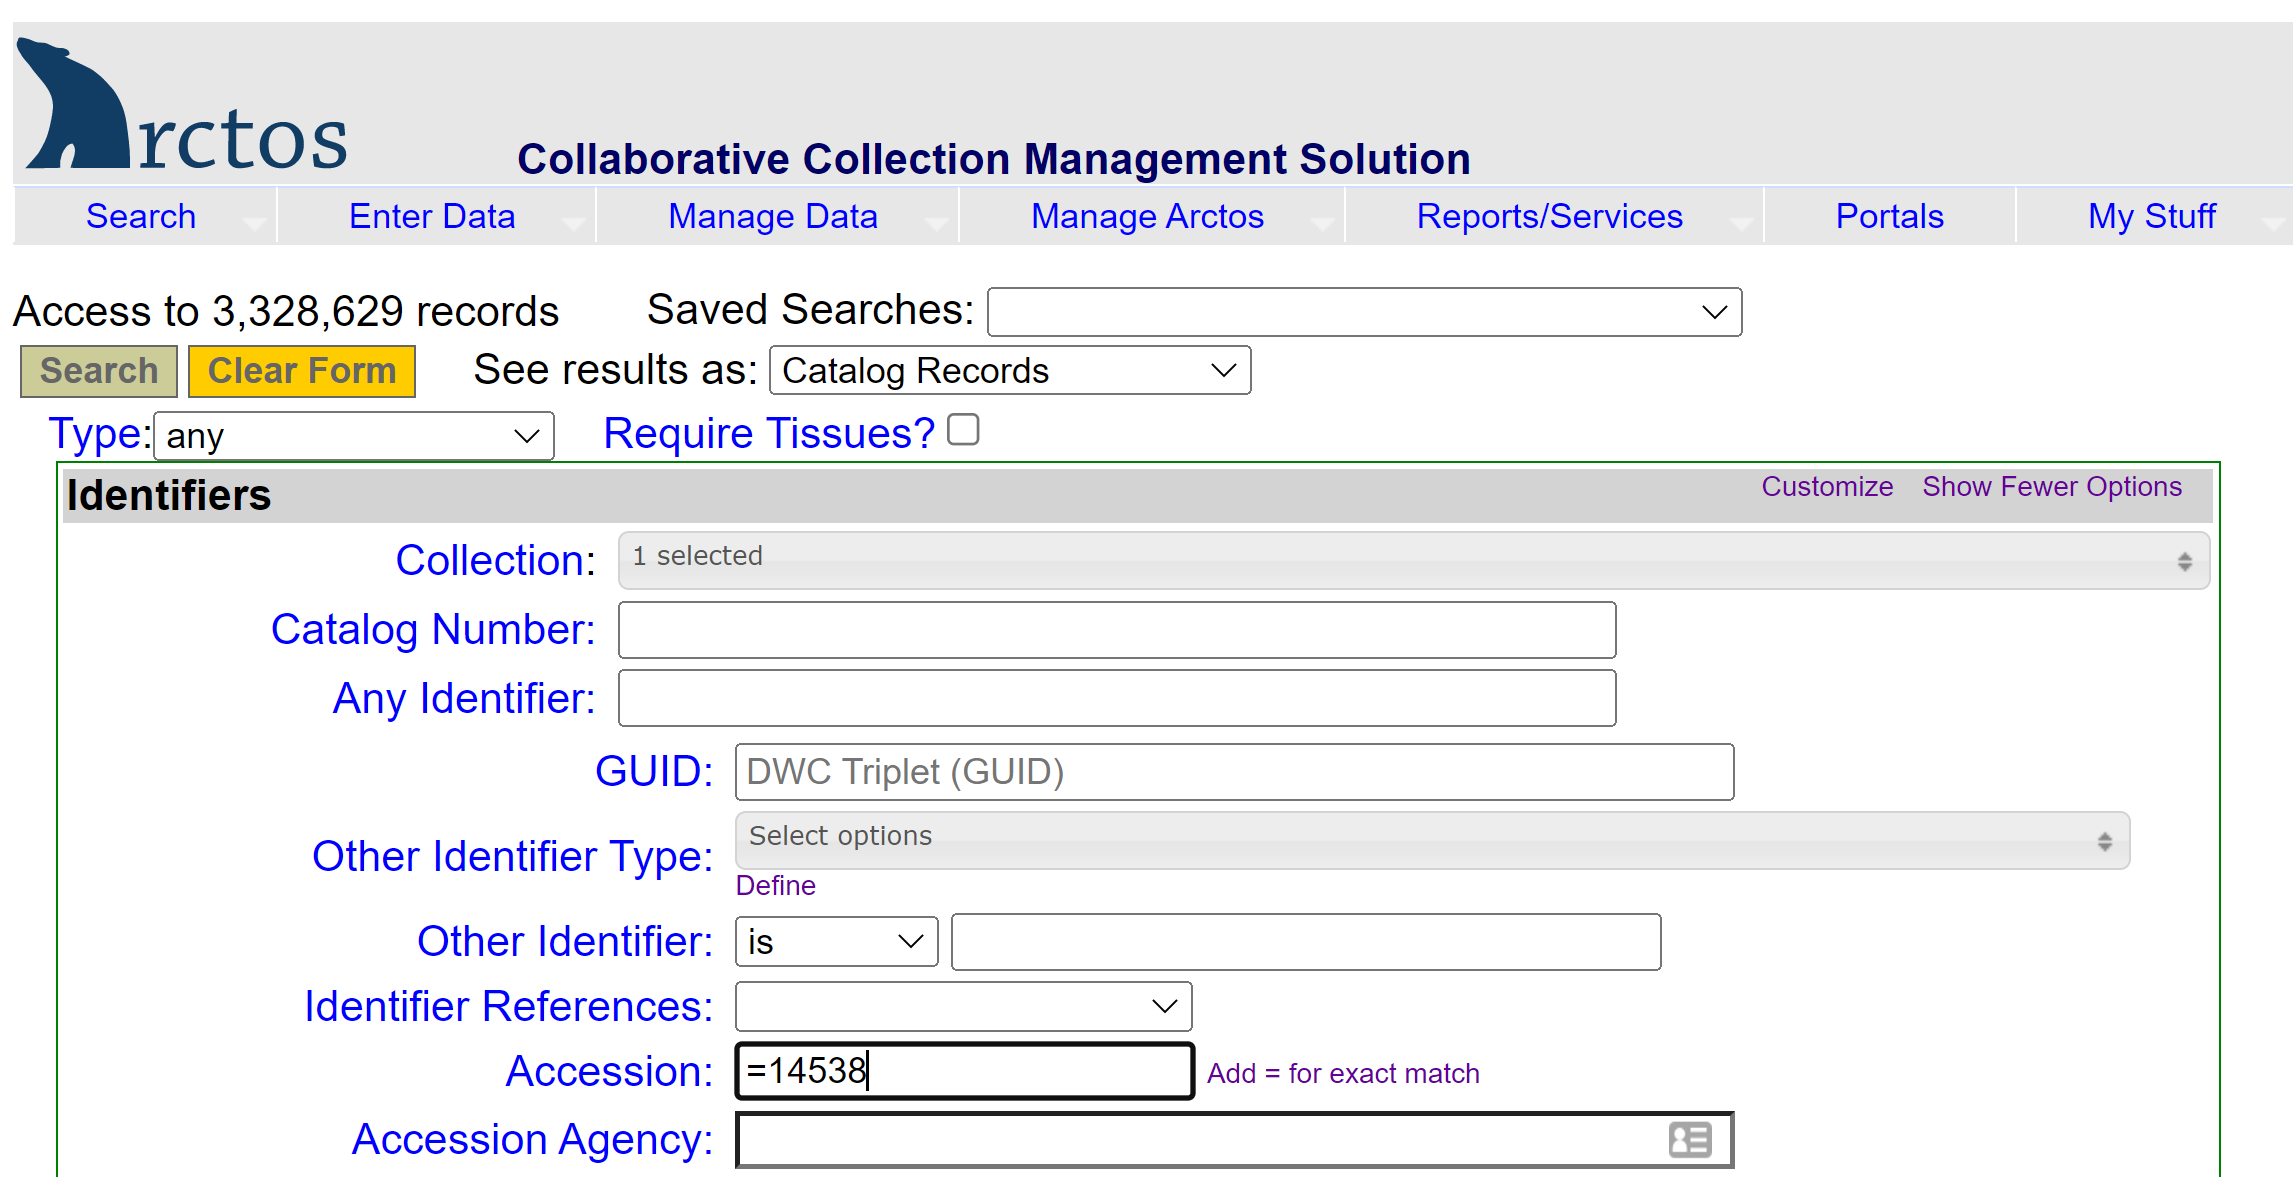
If the data have been loaded into Arctos and you only know the MVZ catalog number or the accession number, you will need to find the collector/preparator information first. Go to Search —> Catalog Records, select the collection from the dropdown (e.g., MVZ Bird Specimens), and enter either the MVZ # in the “Catalog Number” field, or the accession number in the “Accession” field (tip: precede the accession number by an equal sign for faster searching, e.g,. “=15466”). Use the initials for the collector/preparator in your object tracking search.
Example of searching for a tissue vial by collector/preparator initials and number.
Enter the initials and number (e.g., CC 4300) in the label field. The results (right side of screen) show two tissue vials for that specimen (barcodes MVZ238128 and MVZ238129). The first is in position 45 in a freezer box located in Freezer 2, Section F, Rack 55, Slot 3. The second is in position 3 in a freezer box located in Freezer 2, Section F, Rack 55, Slot 5.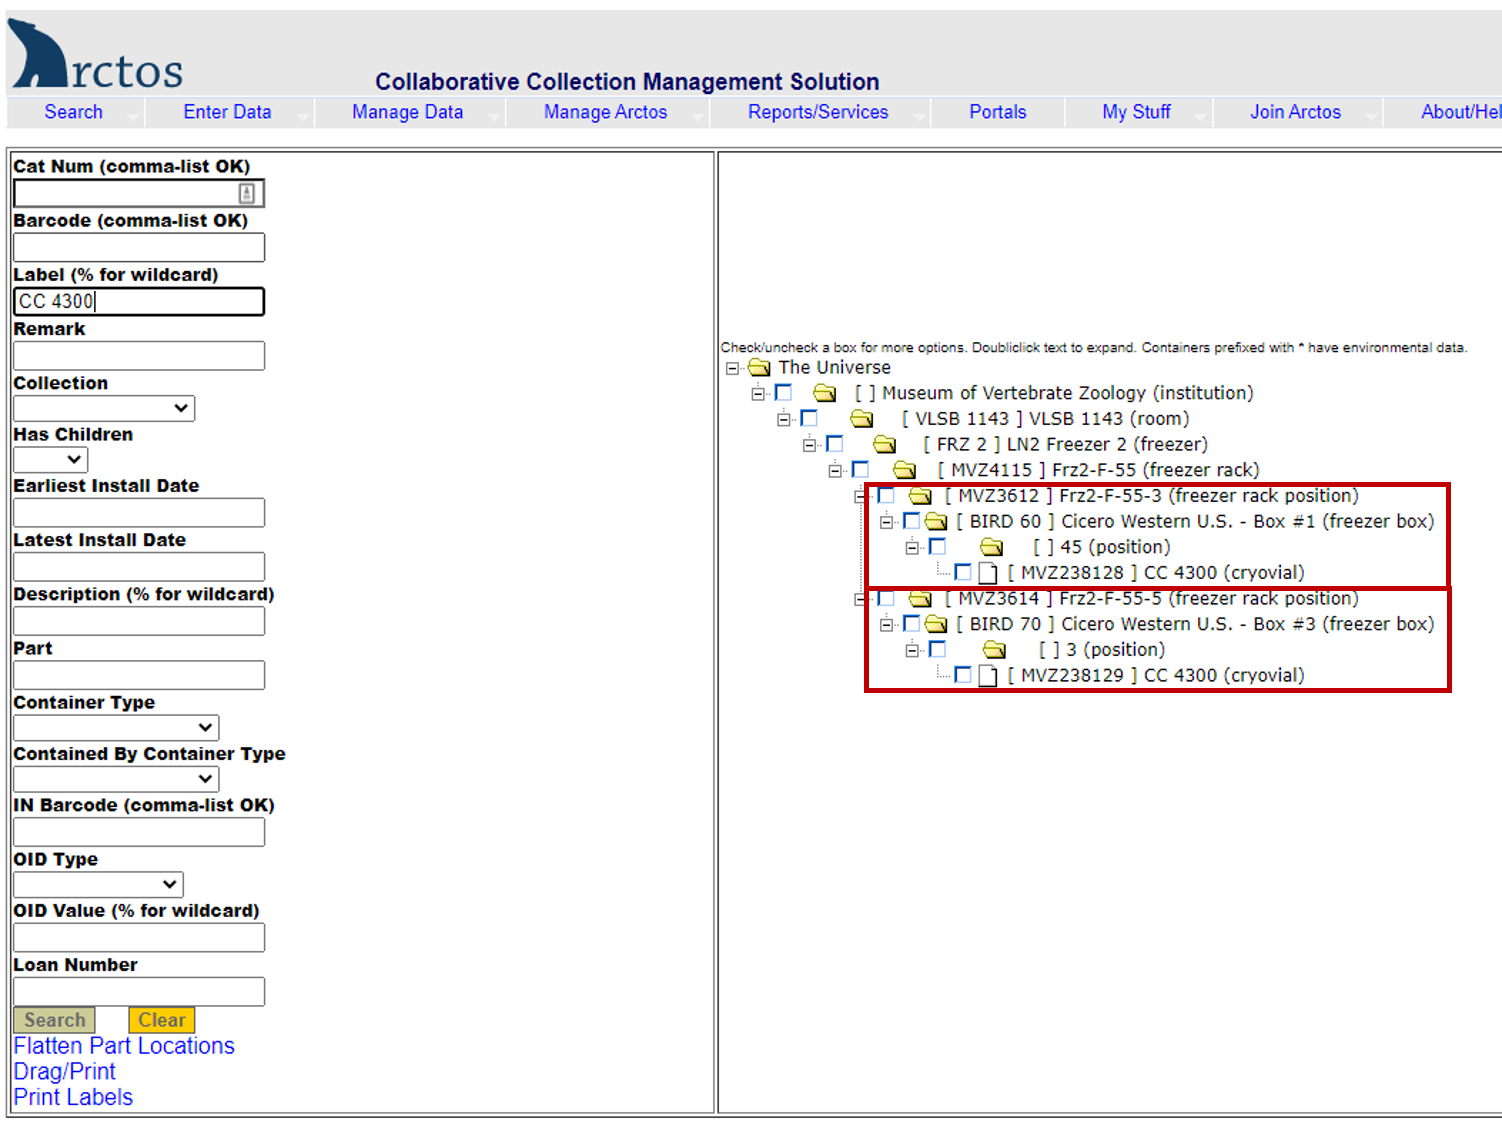
Example of searching for a tissue box by the description:
Enter the description in the label field, using the wildcard symbol “%” as needed (e.g., %mcguire%2010%). The results (right side of screen) show nine boxes in Freezer 1, Section G, Rack 46, Slots 1-8 and 13.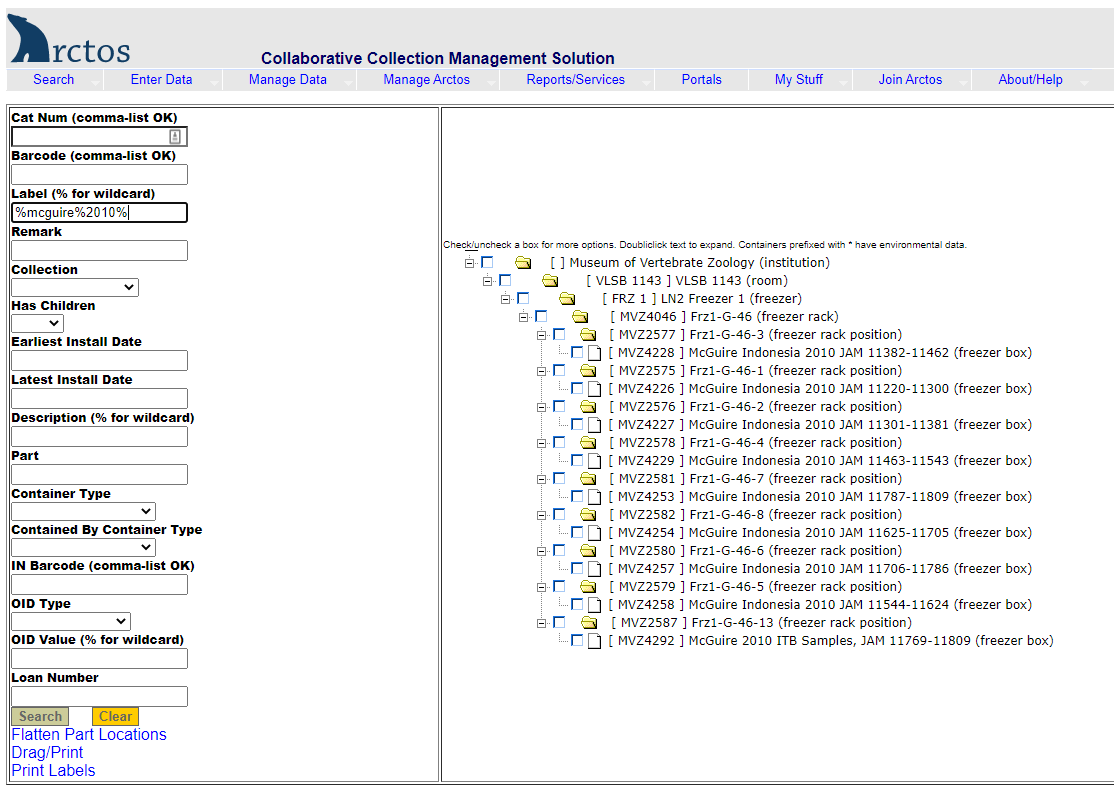

-
Enter “tissue” as a part name and press tab to select “tissue” from the drop-down list.
-
The default condition is “unchecked” but enter something else if applicable (e.g., “tissue possibly degraded”).
-
The default disposition is “in collection” but enter something else if applicable (e.g., “missing” if tissue was reportedly collected but could not be found when cataloging).
-
The default count (#) is 1. Leave that as is. If multiple tissue vials were saved, each vial should be entered as an individual part because it can be tracked separately using the barcode.
-
For the barcode, you can enter it during data entry or afterward. We recommend scanning the barcode from the actual vial rather than typing the barcode from the original catalog entry. If you want to scan the vial during data entry, place the cursor in the ‘Barcode’ field and scan the barcode on the vial. However, it is usually easier to scan all of the tissues at once by updating the part once it is in Arctos (see Adding Tissues by Editing Parts). If you do that, proceed in this order: (a) enter the specimen data except for tissue barcode number(s), (b) get together all of the tissues for an accession and put them temporarily in the chest freezer in the liquid nitrogen facility, (c) update the part by scanning the vial in the liquid nitrogen facility. Always make sure that the barcode scans correctly (i.e., that “MVZ” precedes the number).
-
Enter the tissue type(s) in the remarks field, or any other remark such as information about the tissue disposition if not in the collection. Enter the remark in mixed case and followed by a period (e.g., “Liver, muscle.” rather than “liver, muscle”).
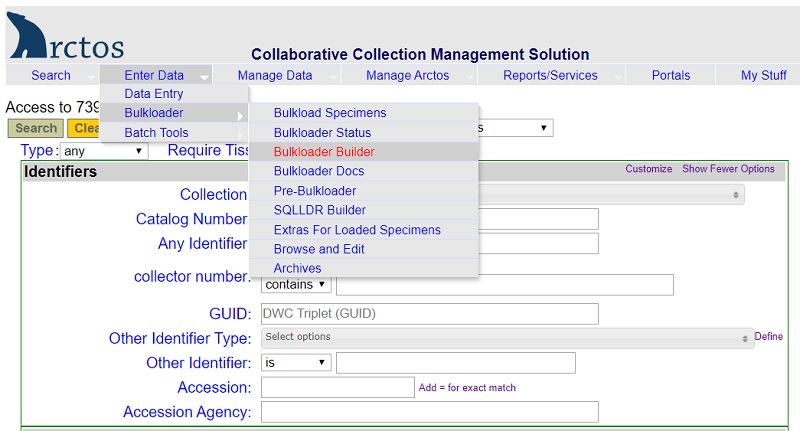
Sample Bulkloader File for Parts:
-
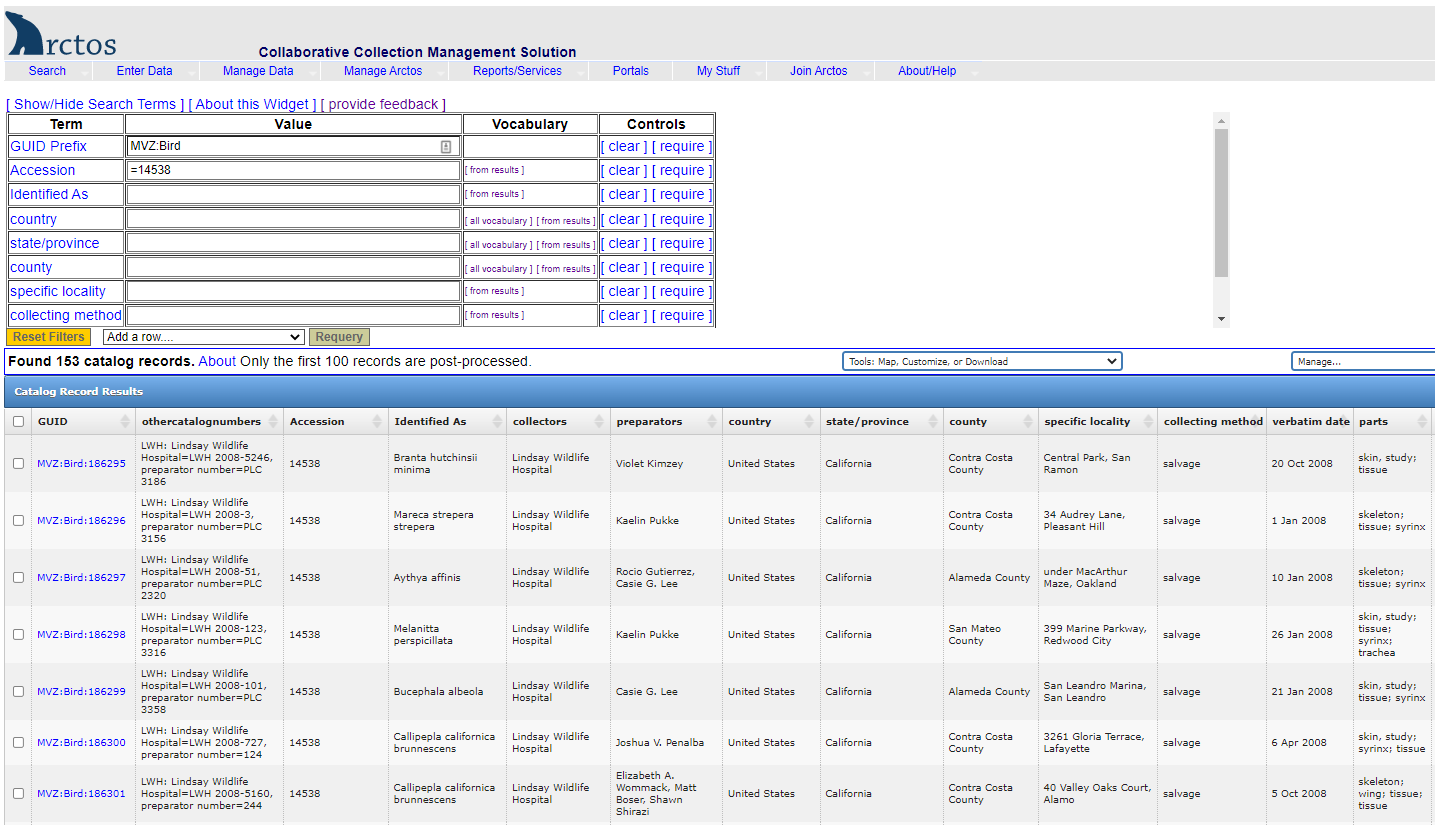
In the dropdown for “Tools: Map, Customize, or Download”, select “Add or Remove Data Fields (columns”) and select the following from the center block of options to include in your result set: Accession, collectors, othercatalognumbers, and preparators. Hit “Save and refresh” to get back to the results set. This will add those additional columns which are needed to find the MVZ catalog number associated with a collector/preparator name and number as written on the tissue vial.
-
At the bottom of the window, change your “Row count” to ensure that all records for the accession show on one screen. For example, if you have 145 records, change the “Row count” to the next highest number of 250.
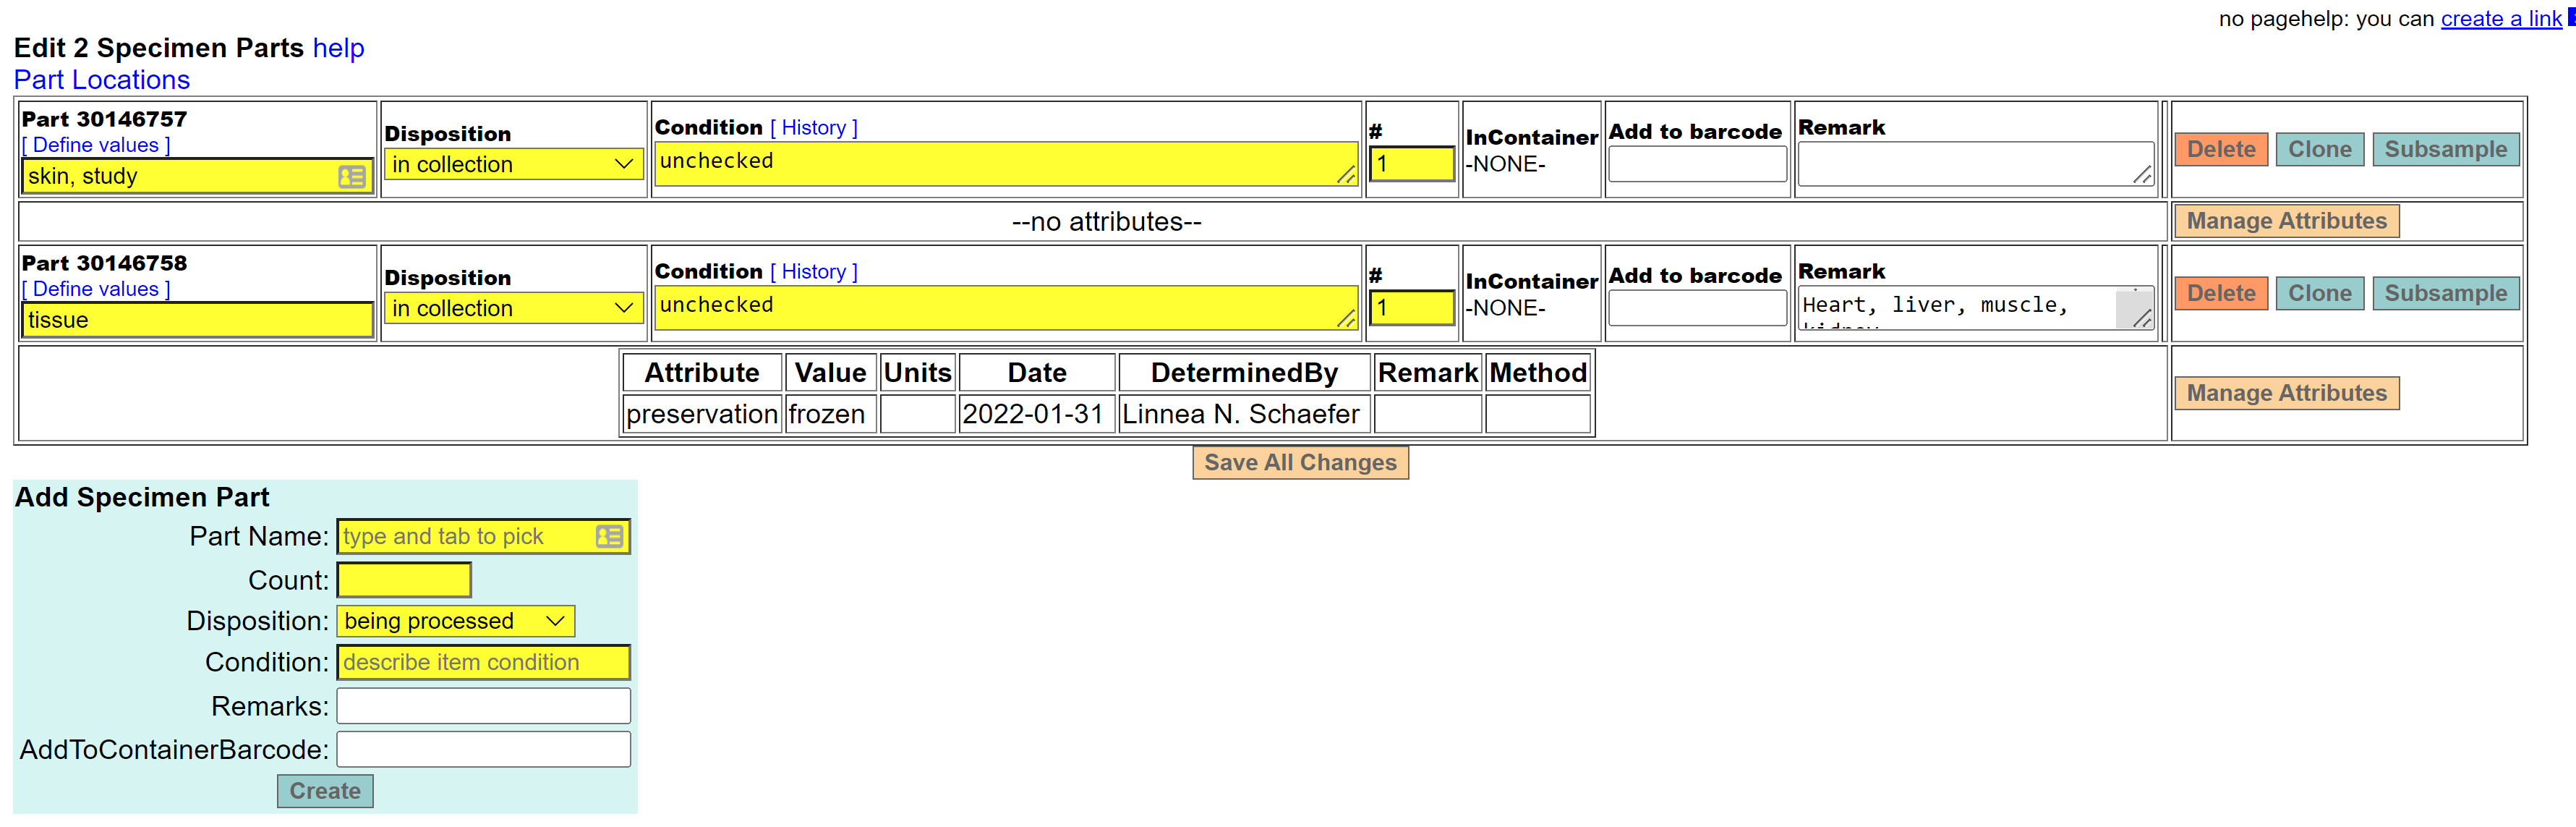
- In the specimen detail page for the MVZ record, scroll down to the Parts box and click ‘edit’ on the right side of the screen to get to the editing screen. That will bring up a new window where you can add new parts or edit existing parts.
-
If a tissue part already exists in Arctos but without the barcode, skip to step 10 below.
-
If you need to add a new part, go to “Add Specimen Part” and enter ’tissue’ in the Part Name field. Hit the tab key. Because there is only one part name of “tissue” in the Arctos controlled vocabulary, it will automatically populate the field with that term. It is important to select the term from the controlled vocabulary by hitting the tab key.
-
In the Count field, enter one (1). If you have more than one tissue vial for a specimen, enter each one as a separate part (i.e., repeat this process for each part). You need to create a part for each vial because they have their own barcode and are tracked separately for loans.
-
In the Disposition field, enter ‘in collection.’ If there is supposed to be a tissue according to the original data but you cannot find it, enter ‘missing’ to track that one existed at some point. Also enter the reason it is missing in the Remarks field, e.g., “Tissue not found when cataloging specimen Feb 2022.” Enter the remark as a sentence, starting with a capital letter and ending with a period.
-
In the Condition field, enter ‘unchecked’ unless the preparator noted something about the tissue, e.g., ’tissue degraded’ in which case enter that. Enter condition in lower case.
-
Use the Remarks field to make a comment about the tissue. This should include the tissue type(s), if known, as well as remarks pertaining to its disposition. Spell out tissue types (even if abbreviated in the original data or on the vial), and separate different tissue types by a comma. Enter the remark as a sentence, starting with a capital letter and ending with a period. Examples: “Heart, liver, muscle, kidney.” or “Liver.” or “Liver. Tissue not found when cataloging specimen Feb 2022.”
-
Scan the barcode on the tissue vial into the AddToContainerBarcode field. Make sure that when you scan the tissue barcode, it scans properly with the number preceded by ‘MVZ’ with no space. This is very important because if scanned improperly, the barcode may place the vial in a container associated with a different collection in Arctos.
-
Hit “Create” to save the new part.
-
You also need to enter a preservation method for the tissue. Once the new part has been created, go to “Manage Attributes” and select “preservation” as the attribute type. Next, select the appropriate preservation value from the dropdown list (common values are frozen or RNAlater or ethanol, 95%). Hit “Create” to save the new part attribute.

-
If the tissue part (with preservation) has already been created, scan the barcode into the ‘Add to barcode’ field. If there are multiple tissue parts, be sure to associate the barcode with the correct vial if relevant. For example, if two vials are saved with different tissue types (“Heart, muscle.” and “Liver, kidney.”), and the tissue type is written on each vial, the barcode for each set of tissue must be scanned into the part with the associated tissue type.