MVZ specimen tags are purchased without string. “Tag tying” is the practice of tying string to the tags so that they attach properly to the specimens. It is very important to be consistent in how the tags are tied so that they are all standardized.
There are four main kinds of specimen tags used in the MVZ:
Skin tags (two holes) – Rectangular paper tags with the institution name (“University of California Museum of Vertebrate Zoology”) on one side and a dotted line at the base on the other side. Skin tags are not purchased with holes; these are drilled in the Prep Lab.
Fluid data tags (two holes) – Similar to skin tags, but the paper is heavier and there is no dotted line on the side opposite the institution name. These are used only by the bird and mammal collections for fluid-preserved specimens, and include data similar to skin tags.
Skull tags (one hole) – Small round tags on heavier paper. These are purchased with a hole already drilled.
Fluid herp/field tags (one hole) – Small rectangular tags on heavier paper, about 1 inch long and sold in strips. These are used on fluid specimens in the field, and occasionally in other circumstances (e.g., inside vials for fluid-preserved parts, no string attached). Blank tags typically are used to write the field/prep number and minimal other data (unlike the fluid data tags). The herp collection uses similar tags that are pre-printed with “UC, MVZ” on one side and the museum catalog number on the other side.
Skin tag (front).
Skin tag (back).
Herp pre-printed tags (both sides).
Before tying tags, make sure that the holes are not too close to the edge of the tag. If it looks like the holes are too close that they might rip through, set the tag aside. Also check that the printing on the tag is correct (if relevant). Occasionally, tags are mis-printed or lack the institution name, and these cannot be used in the collections.
Since tags are tied in 100-lots, it is easier to do the work in units of 10. After 100 tags are finished, tie them together in a bundle.
Cutting the string
To ensure that the string for tags is cut to a standard length, use the special wooden board with two nails and a needle. This board is kept on the central table in the curatorial area.
Use only No. 8 cotton string. Put the spool of string on the floor so that the string unspools off the top.
Fasten string to the base of the right-hand nail with a piece of tape.
Wrap the string around the outside nail and wind it back and forth 5 times to make 10 strings. The distance between nails is the length of one string.
One nail is smooth at the top so you can lift the loops off. Lift off the loops and cut them at each end in pieces of even length.
Tying skin or fluid data tags
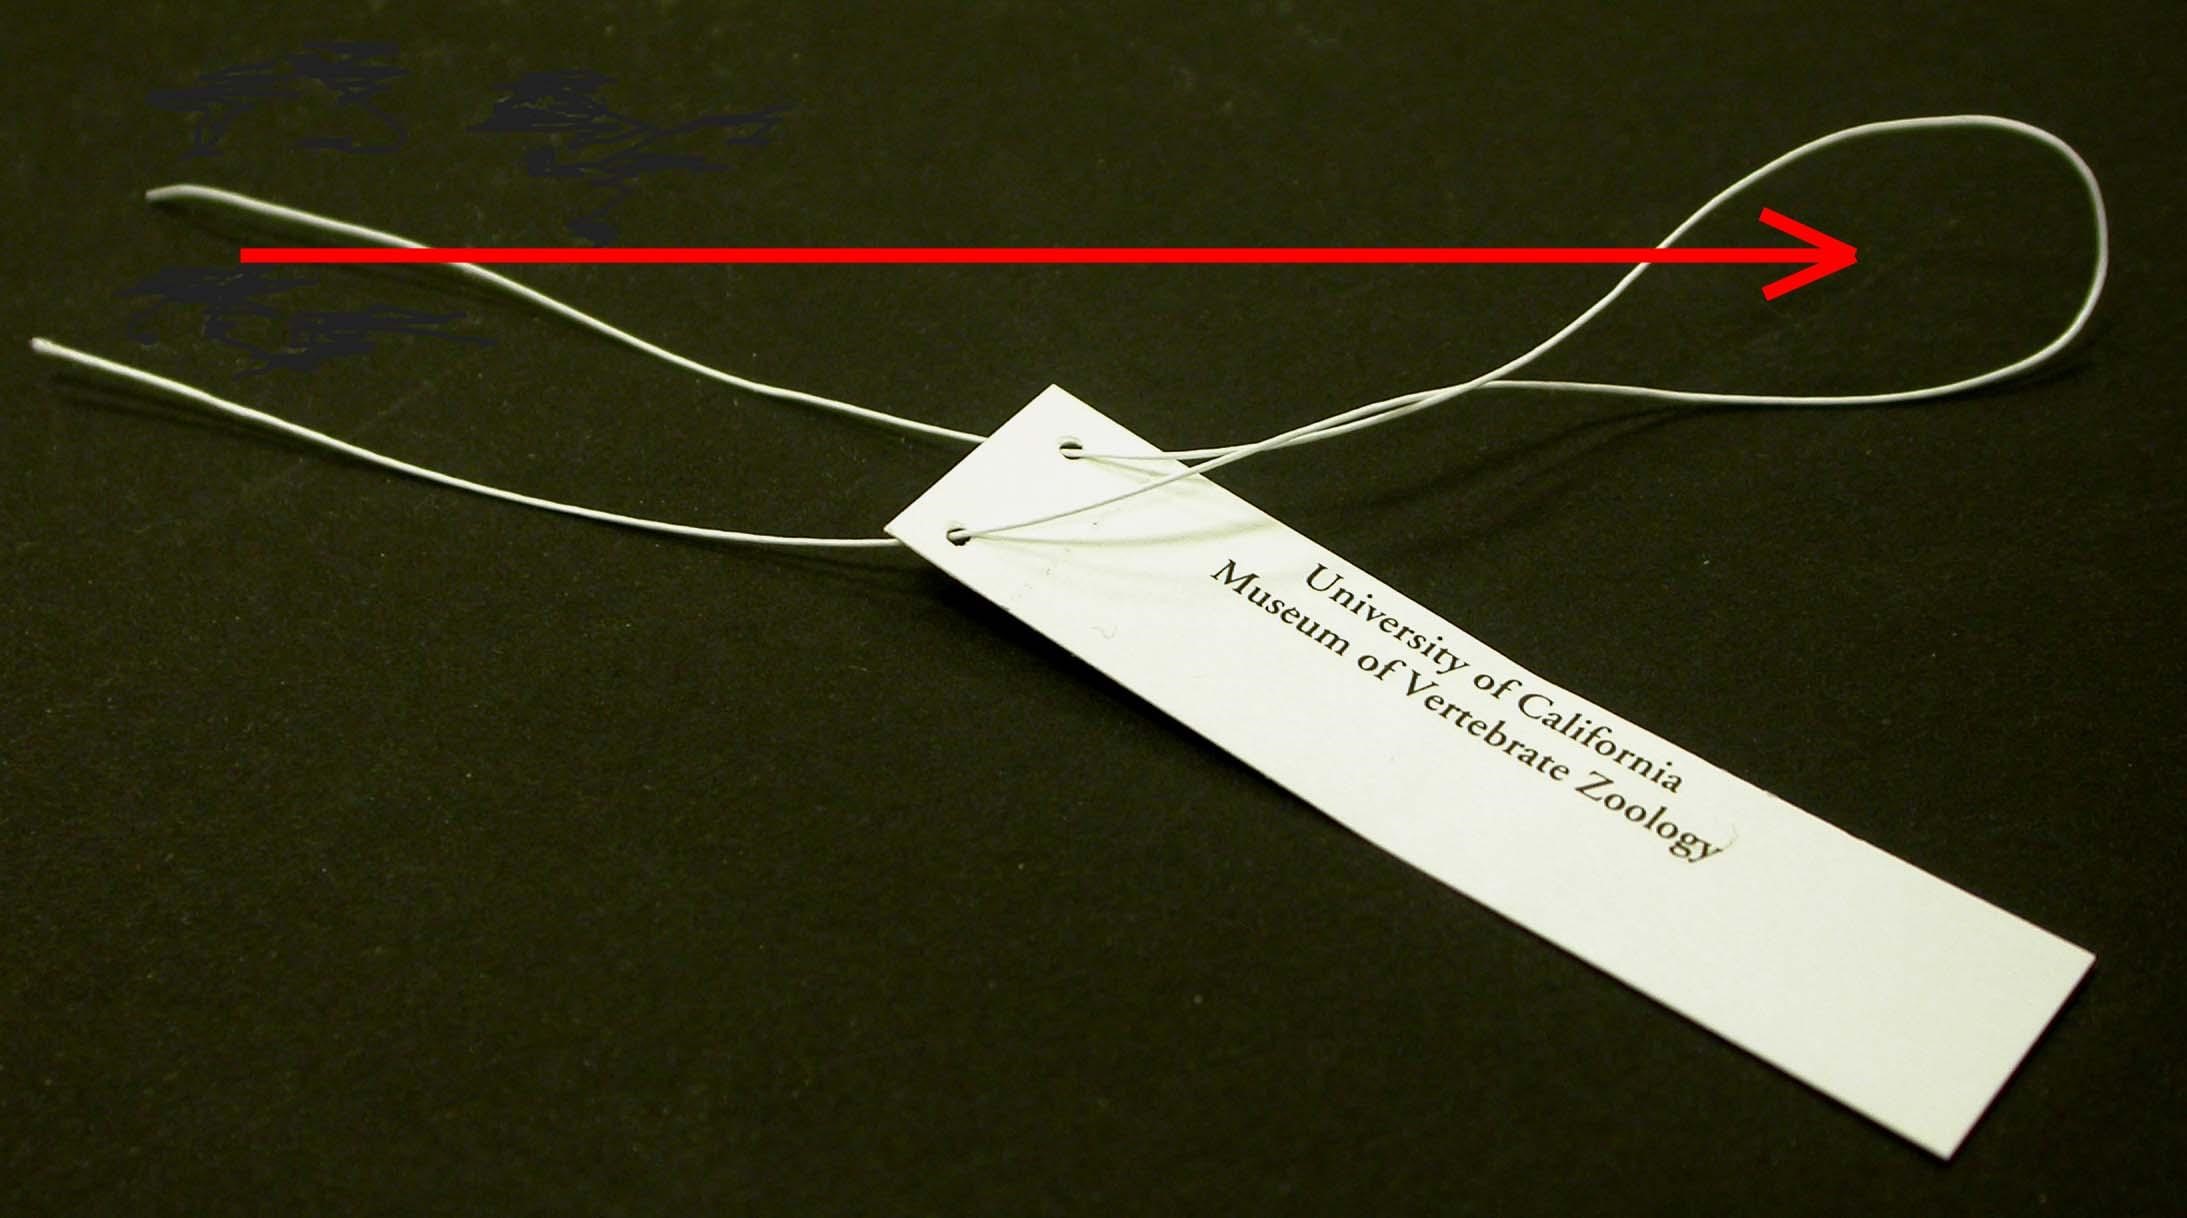
Draw the string through each hole in the tag.
Place ends of the string together, keeping them even.
Loosen the loop of string from the tag, and pull it out far enough to make a 180° twist.
Draw the two ends of the string through the loop.
Pull them tight to the mid-point of the tag, but be careful not to rip the paper.
Make a loose knot in the string.
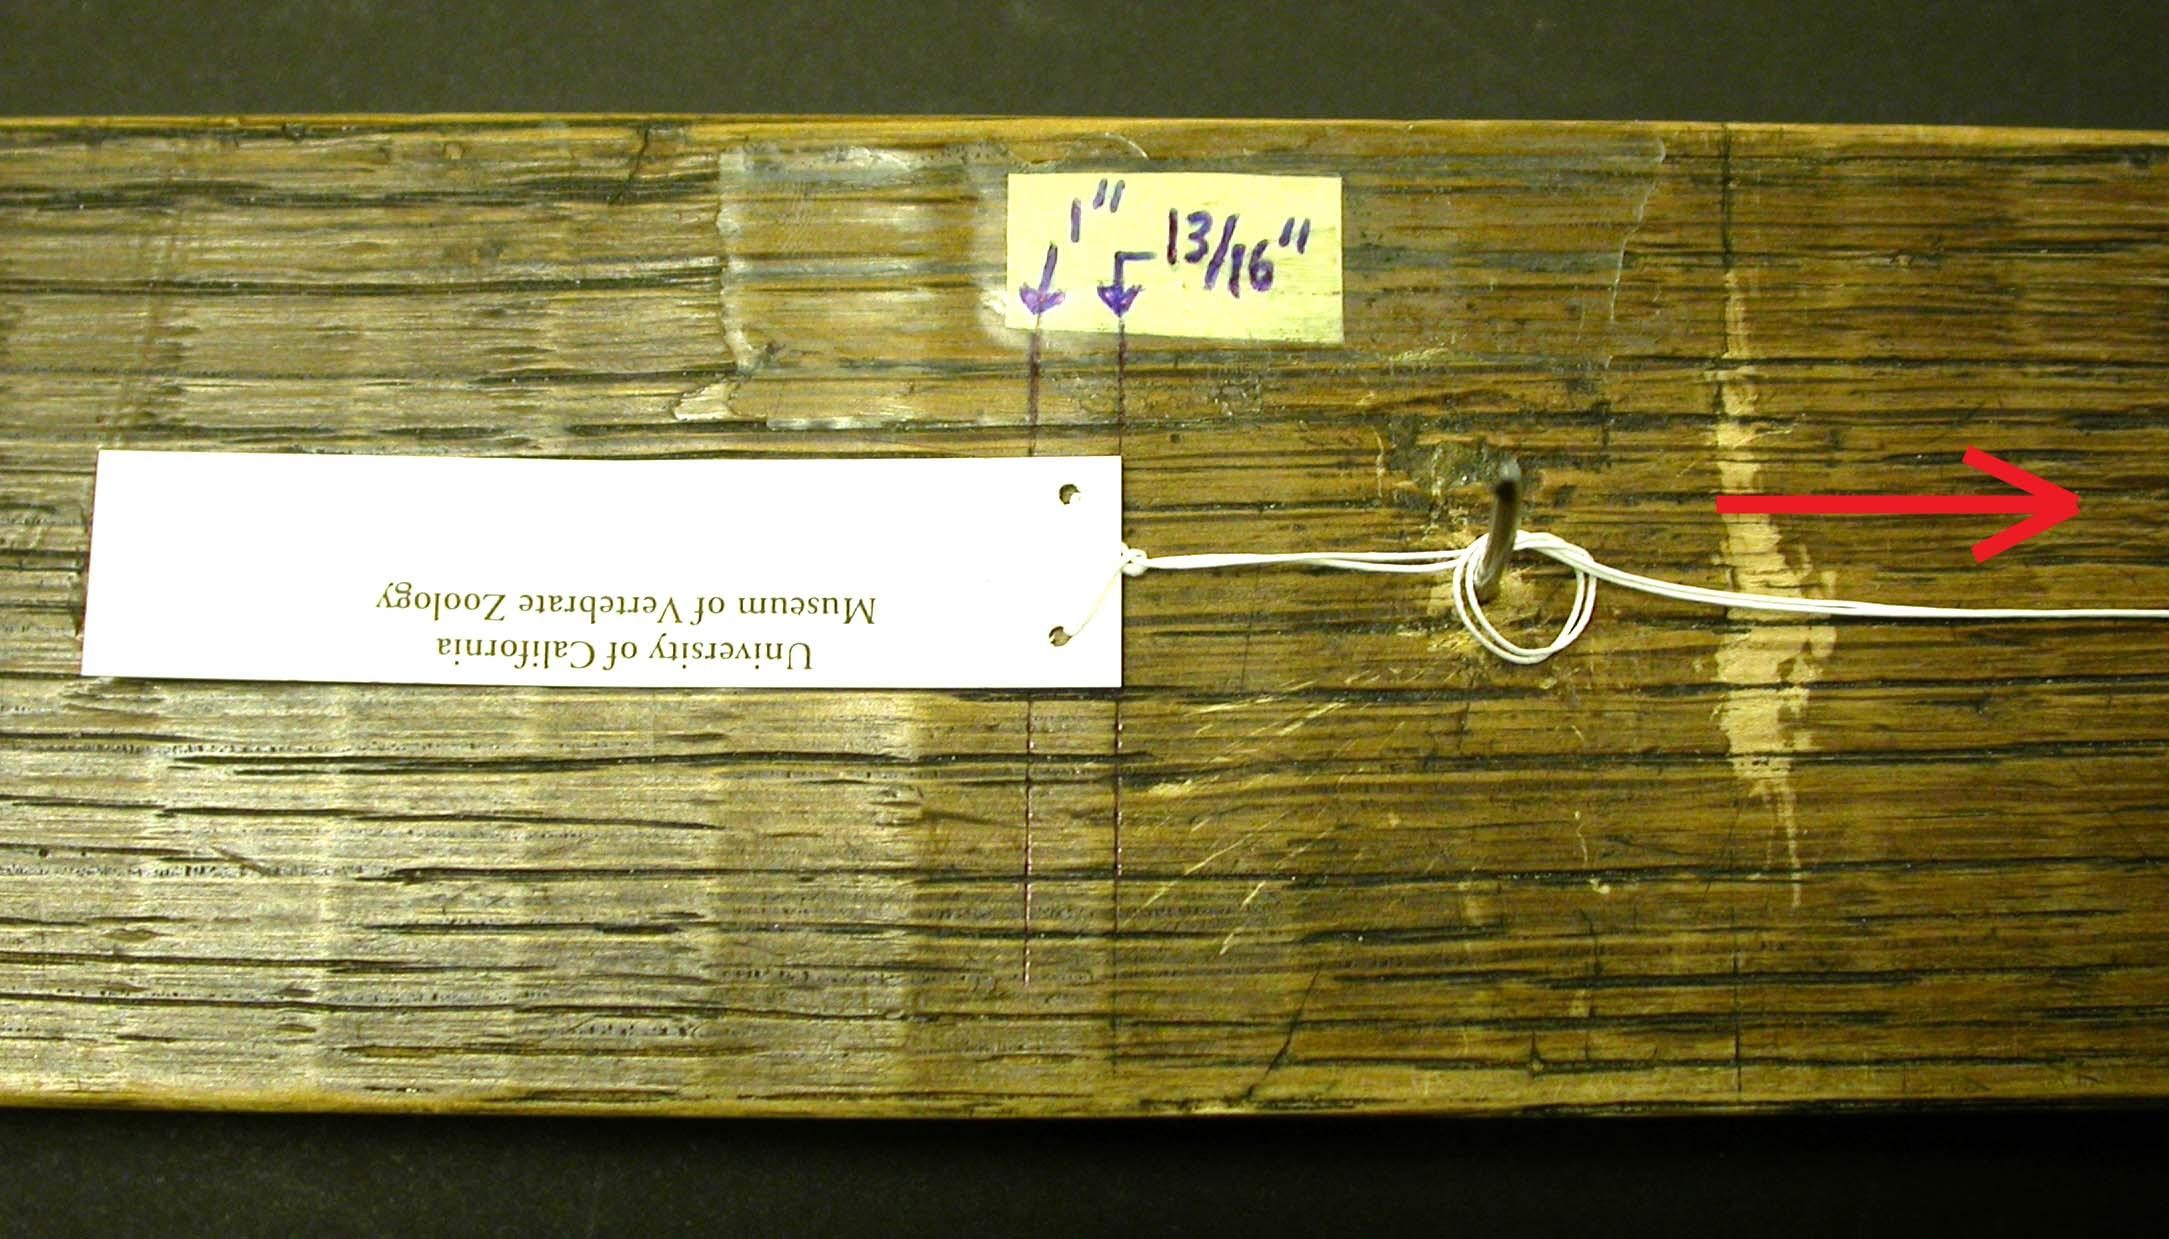
Place the tag with the string end exactly on the line marked 13/16”.
Place the loose knot over the needle and, while holding the tag in place, pull the ends of the string parallel to the side of the tag.
Pull the knotted striing off the needle and draw the knot away from the tag, watching to make sure the knot extends exactly 1 inch from the end of the tag. Check the length. If correct, draw the knot as tightly as possible. If the distance between the knot and tag looks too long or short, loosen the knot and try again.
#1-4. Draw the ends of the thread through this loop.
#5. Pull tightly to the midpoint of the tag.
#6-9. Pull the ends of the string away from the tag.
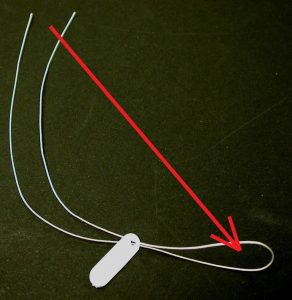
Tying skull and field tags
The procedures for tying skull or field tags (i.e., tags with only one hole) are the same, except that you put both ends of the string through the hole and both ends of the string go back through the loop. You do not need to make a twist in the loose loop of string.